
We may earn revenue from the products available on this page and participate in affiliate programs. Learn More ›
In the middle of a hot summer, the garage can quickly turn into an oversized oven that becomes more uncomfortable as the temperature rises, and in the winter it may be too cold to properly use, even with a space heater. However, by properly insulating the garage you can prevent the flow of heat into and out of the space, keeping it cool in the summer and warm in the winter. Insulation also can lessen exterior noise, like traffic or loud neighbors. Discover garage insulation ideas, types of garage insulation, and detailed steps for how to insulate a garage.
Why should you insulate your garage?
Whether you are heating the garage, installing a garage air conditioner, or trying to reduce heat loss through an attached garage, insulation is an effective way to lower your energy bills, provide enhanced temperature control, and keep your belongings safe from the extreme temperature fluctuations that are common during the summer and winter.
- Lower energy bills: An insulated attached garage prevents outdoor air from bleeding into your house, reduces the load on your heating and cooling system, and saves you money on your energy bills.
- Better temperature control: Insulation slows heat transfer, keeping the space cooler in the summer and warmer in the winter. This makes adjacent rooms or a workshop much more comfortable.
- Protection for belongings: Stable temperatures safeguard your car battery, stored tools, paint, and chemicals from freezing or overheating. It also helps control moisture and reduces the risk of mold.
- Noise reduction: Dense insulation dampens outside traffic sounds and muffles loud noises from DIY projects or tools inside the garage.
- Increased property value: Energy-efficient upgrades appeal to buyers and can improve your home’s overall marketability.
Types of Garage Insulation
Before planning a DIY garage insulation project and purchasing the tools and materials, you have to decide what type of insulation for the garage you’ll use. Additionally, you’ll have to think about the insulation’s R-value, which is essentially a measure of how well a material resists the flow of heat. Thicker or denser materials typically have a higher R-value, which allows them to insulate a space better than thinner, less dense materials. Before you decide on insulation, research the R-value that’s recommended for your region.
Fiberglass Batts
One of the most common and cheapest ways to insulate a garage is to use fiberglass batts. Available in pre-cut rolls made of glass fibers that easily fit between standard wall studs, they are budget-friendly and very DIY-friendly, offering R-values between R-2.9 to R-4.3 per inch. The downside of fiberglass is that it can be vulnerable to moisture damage, so it’s important to seal any cracks or fix potential leaks before installation.
Rigid Foam Panels
Installing rigid foam panels on your walls or garage doors can be a good way to customize garage insulation for spaces with a lot of tight spots or awkward angles because they can be cut to fit these specific areas. Like fiberglass, rigid foam panels are relatively affordable, and they have an R-value between R-3.6 to R-6.8 per inch. But when you are working with these materials you need to be careful to avoid applying too much pressure that could snap off corners or crack the panels.
Cellulose
Typically made of recycled newspaper and then treated with a fire retardant, cellulose is a loose-fill insulation that can be blown into wall and ceiling cavities. You can generally rent a blower at your local home improvement store, so you don’t need to hire a pro to complete the work. The R-value of cellulose is slightly higher than fiberglass, ranging from R-3.2 to R-3.8 per inch. However, cellulose insulation tends to cost more than fiberglass and requires a finished space to contain the blown-in insulation which can drive up your garage insulation costs.
Spray Foam

The best insulation for garage spaces is often spray foam due to the high R-value and air sealing qualities. This high-end material is ideal if you are looking to turn the garage into a new living space, but may be more than your budget can handle if you are just looking for a fast, cheap way to insulate a mostly unused garage. The R-value for spray foam depends on whether you are using open-cell foam, which ranges from R-3.5 to R-3.8 per inch, or closed-cell foam, which ranges from R-6 to R-7 per inch.
Garage Door Kits
If you are wondering how to insulate a garage door without impeding the operation of the door, then it’s best to go with a garage door insulation kit that is specifically made for this purpose. Typically, DIY garage door insulation kits will range in R-value depending on the specific material the kit uses. Alternatively, you could cut and install fiberglass batts for your garage door if you have some leftover after insulating the walls of the garage. This method is easy to DIY and straightforward to repair in the future during garage door maintenance.
Before You Begin
Insulation materials like fiberglass and cellulose can release tiny particles that cause skin and lung irritation, so it’s important to properly ventilate the space before you start to work. Additionally, spray foam insulation releases strong chemical vapors during application and requires strict ventilation during installation and curing. Always turn off power to the garage circuits before working around exposed wall cavities or electrical wires to reduce the risk of shock.
Before you begin, inspect the garage for existing leaks, cracks, dampness, or mold, and make necessary repairs to prevent future problems. Wear personal protective equipment, including safety glasses, respirator, thick work gloves, closed-toe shoes, long pants, and a long-sleeved shirt. While installing fiberglass batts is typically manageable for one person, if you choose blown-in cellulose or spray foam it is good to have a second person around to help manage the hose and the machine.
Bobvila.com may earn a commission from purchases made through these links.Tools & Materials
- Hammer
- Screwdriver set
- Pry bar
- Masonry sealant
- Caulking gun
- Fiberglass batts
- Rigid panel insulation
- Utility knife
Step 1: Remove anything mounted to the walls.
Before you can insulate, you need to prep the walls by removing anything mounted to them. Nails, screws, and hooks are commonly installed on the wood studs of a garage so that lawn tools, ladders, and other objects can be mounted on the walls when they aren’t being used. A hammer, screwdriver, or pry bar is typically all that you need to remove any hooks, nails, screws, or other fasteners and objects that may be mounted to studs.
Step 2: Seal any cracks or gaps along the exterior wall.
Inspect the outside of the garage and the inside of the garage to detect any cracks or gaps along the exterior walls. It’s also a good idea to determine if there are any cracks or gaps in the wall that’s shared with the home. These narrow crevices can allow insects and other pests to invade and water also can cause the gap or crack to expand while contributing to mold growth and ongoing water damage inside the garage.
Apply waterproof masonry sealant with a caulking gun to seal any cracks, holes, or gaps. Allow the sealant to dry and cure according to the manufacturer’s directions before installing insulation.
Step 3: Install batts of fiberglass insulation between wall studs.
After the walls are properly sealed and clear of any nails, screws, and hooks, you can begin installing insulation. Fiberglass batts and rigid panel insulation are the most commonly used options due to their versatility and affordable price. Fit the insulation into the gaps between the wall studs and use a sharp utility knife to cut the insulation to the correct size instead of forcing the insulation to fit the space.
+
Applying a vapor barrier on the warm side of the insulation helps to protect the insulation, the studs, and the exterior wall from issues that can be caused by excess moisture like rot and mold growth. In temperate climates, the vapor barrier is applied over the insulation on the room side by stapling the vapor barrier to the wall studs. However, it’s important that the vapor barrier isn’t damaged because any holes can trap moisture and lead to problems inside the walls.
Step 4: Install drywall.
With the insulation installed and the vapor barrier in place, the job is done and the garage is now insulated against exterior temperatures. However, taking the next step to hang drywall will help keep the insulation in place and provide fire protection.
Measure the walls to find out how many sheets of drywall, how much tape, and how much drywall compound is needed to transform the room into a finished space. Then, put together a basic plan for the layout. After checking all of the measurements, begin hanging the drywall. Secure the pieces of drywall to the studs of the garage using drywall screws, continuing until all of the walls and the ceiling are completely covered.
If you want a finished look for the garage, tape and mud the drywall, then sand the drywall compound to get a smooth surface. Finally, the walls can be painted to completely finish this update to the garage.
How to Insulate a Garage Ceiling
The ceiling can typically be insulated in essentially the same way as the walls, though it will likely require at least two people, with one up on a ladder and the other nearby to hold insulation, pass tools, and support the ladder.
- Remove anything mounted on the ceiling, like hooks, nails, or screws.
- Seal any cracks or gaps by using waterproof caulk, then allow the sealant to dry and cure according to the manufacturer’s directions before installing insulation.
- Fit fiberglass or rigid foam panels between the ceiling joists, using a sharp utility knife to cut the insulation to the correct size.
- Apply a vapor barrier over the insulation using a staple gun to attach it to the ceiling joists.
- If you want to install drywall over the insulation, then take measurements of the ceiling to find out how many sheets of drywall, how much tape, and how much drywall compound is needed.
- Cut the drywall sheets to the correct size, then ask someone to help you hold the drywall sheets to the ceiling as you secure them to the ceiling joists with drywall screws.
- Tape and mud the drywall, then wait for the compound to dry before sanding it smooth.
- Paint the drywall to give the project a finished look.
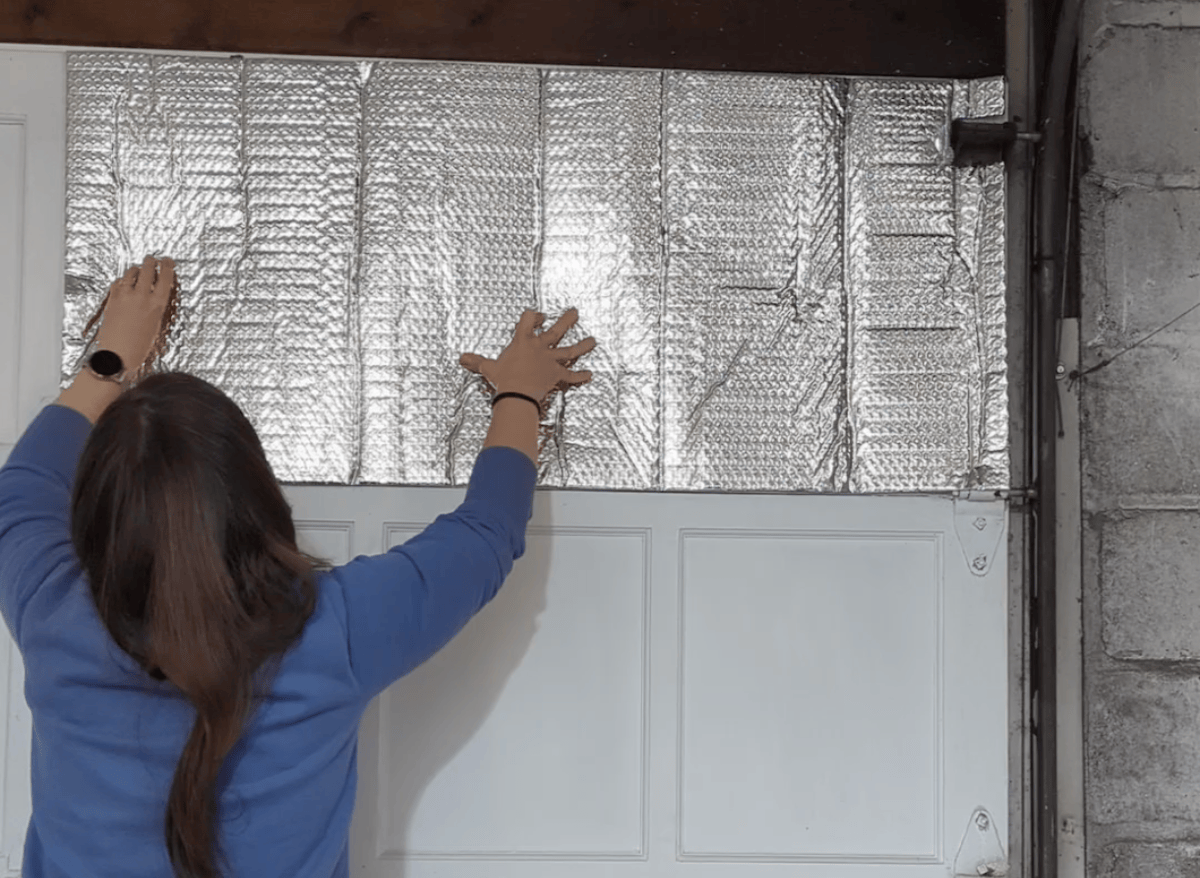
How to Insulate a Garage Door
SUPPLIES
Cloth
Tape measure
Double-sided tape
Retention clips
Fiberglass batts
Utility knife
Insulating the garage door is not the same process as insulating garage walls. A garage door doesn’t have studs that create the modular wooden frames that help secure the insulation, and requires individually cut pieces of insulation for each of the garage door panels.
- Clean the door panels by wiping them down with a dry rag to remove dust and oil.
- Measure and mark the center of each individual door panel so they are vertically centered and about 12 inches away from the panel’s edge.
- Apply adhesive-backed retention clips on the marks.
- Measure and cut the insulation to fit onto the individual garage door panels.
- Place the fiberglass batts against the garage door and use a utility knife to make small cuts in the fiberglass where it lines up with the retention clips.
- Slide the retention clip through the opening, then secure the insulation with snap-on retention pin caps.
Final Thoughts
Follow this simple method to properly insulate the garage, including the walls, ceiling, and garage door. By adding insulation to the garage, the space is protected against extreme temperature changes, allowing users to enjoy the garage in the middle of winter or in the sweltering heat of summer. However, it’s important to remember that all fasteners and any hanging objects need to be removed to prevent damage to the insulation and any cracks, holes, or gaps in the exterior wall should be sealed before installing the insulation to prevent pest infestations, water damage, rot, and mold growth.
FAQ
Q. How much does it cost to insulate a garage?
Typically, it will cost about $0.50 to $1.25 per square foot to insulate a garage, about $1 to $3.89 per inch to insulate a garage ceiling, and about $200 to $300 to insulate a garage door. This means that you can expect to pay about $600 to $1,500 to insulate a 1,200-square-foot garage.
Q. Should an unheated garage be insulated?
You do not need to insulate the entire exterior of an unheated garage, but it’s important to insulate and air-seal any walls or ceiling that separate the garage from the conditioned living spaces of the home.
Q. Can you insulate a garage yourself?
Some types of insulation can be installed by an experienced DIYer, such as fiberglass batts or rigid foam insulation. However, other types, like spray foam insulation, should be installed by a pro for the best results.
Q. What R-value do you need for garage walls?
For exterior wood-frame walls, such as those common in garages, it’s recommended to have an R-value of R-13 to R-21, depending on your climate zone and whether the garage is heated. If the garage is unheated, then you do not need to insulate the exterior walls. However, consider insulating any walls or ceiling that separate the unheated space from the conditioned living spaces of the home in order to keep the inside of the home comfortable.
The post How to Insulate a Garage appeared first on Bob Vila.