
We may earn revenue from the products available on this page and participate in affiliate programs. Learn More ›
Thatch, which comprises living and dead material, accumulates naturally where blades of grass meet the soil. It’s made up of mulched leaves and short grass clippings that tend to decompose quickly. Dethatching removes that excess organic matter and can help keep your lawn healthy over the long term, though it can leave the lawn looking anything but lush immediately afterward.
With the excess matter removed via dethatching, grass roots will be able to spread and fill in the bare spots, particularly if important post-thatching steps are taken to improve the health of your lawn. Follow the steps below, and use the proper dethatching tools, to help your lawn thrive.
Why Dethatching Is Important

Allowed to grow unchecked, thatch forms an impenetrable barrier that prevents water, air, and nutrients from reaching grass roots. A thatch layer of an inch or more is a breeding ground for fungal diseases and mosquitoes that favor humid, wet conditions.
The buildup of these materials often outpaces decomposition and the thatch layer thickens. The thicker the layer, the more difficult it becomes for water, nutrients, and air to reach grass roots. What’s more, grass roots become snarled in thick thatch instead of knitting into the soil, making them vulnerable to damage in prolonged periods of hot, dry weather. When this happens, the lawn suffers and it’s time to dethatch.
Dethatching Tools
The best dethatching tool for your lawn depends on the size of your landscape and how much work you’re up for.
Manual Thatching Rakes
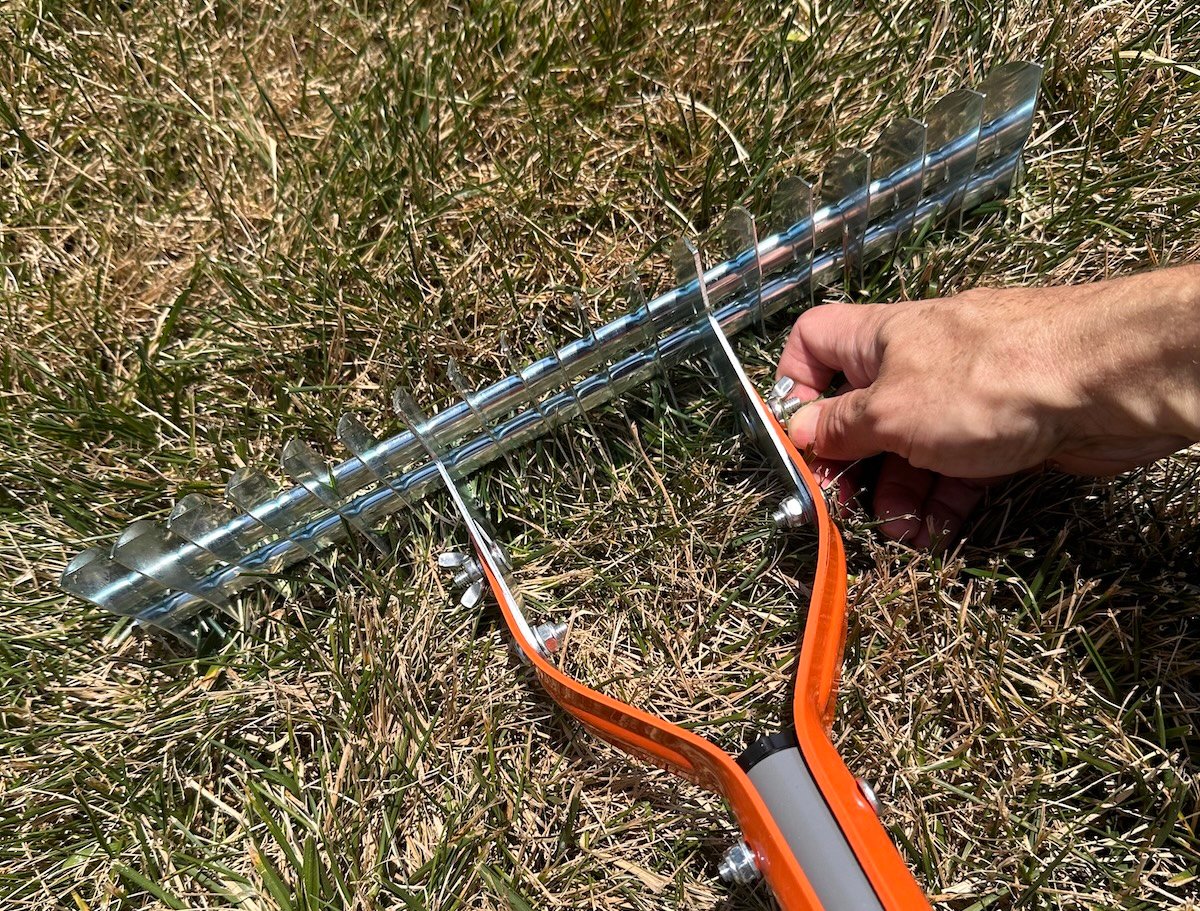
Manual thatching rakes are available at most lawn and garden stores; they’re popular for smaller lawns, light thatch, and general thatch maintenance through the growing season.
How to use: By using the same motion you would to rake leaves, the short tines and curved blades of a dethatching rake (such as TRG’s Groundskeeper II) can dig into your lawn to pull up the thatch layer. Our researched guide on the best dethatching rakes has a variety of excellent options.
Power Rakes
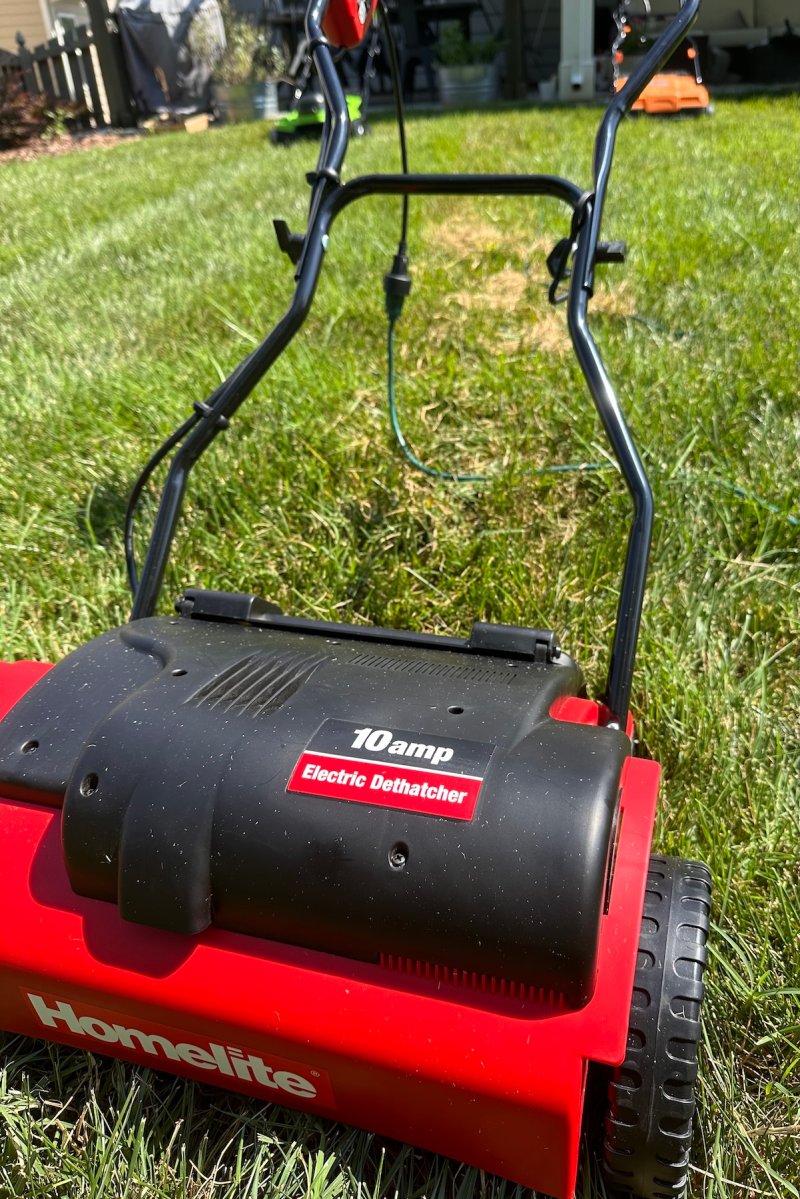
Power rakes are the way to go for larger areas of thinner thatch layers with grass that can withstand intense raking. These are best for homeowners with big yards or persistent thatch issues. However, power rakes can disrupt the surrounding soil and damage nearby vegetation if not handled properly.
“Power rakes are designed for heavy-duty thatch removal, equipped with rotating blades that aggressively cut through and remove dense layers of thatch,” says Gene Caballero, co-founder of GreenPal, a Tennessee-based lawn care company.
How to use: The electric version of a dethatching rake is pushed much like a lawn mower. Instead of blades, a power rake has rotating tines that dig into thatch and lift it out as you push. Power rakes are available for rent at many home improvement and hardware stores.

Photo: Amazon
Greenworks 15″ 40V Cordless Dethatcher/Scarifier
Just 26.5 pounds, the Greenworks dethatcher/scarifier is easy to push and dethatches like a beast. Expensive, but worth it. Read the review.
Photo: Amazon
Vertical Mowers
Vertical mowers are the heavy-hitters that work best for thick thatch layers, and considering how infrequently they’re used, these machines are often better rented rather than purchased.
How to use: Lawns with thick thatch or those in need of total renovation would benefit from this aggressive approach. Vertical blades on a mower or scarifier (this model from Sun Joe is one to consider) penetrate the thatch layer and the soil. It’ll lift the thatch—and plenty of grass roots—out.
Signs Your Lawn Needs Dethatching
Thin blades, weak growth, and pale color are telltale signs that your grass is struggling. To confirm whether thatch is the culprit, you’ll have to do some digging. Use a sharp trowel or spade to dig up a small section of grass. You’ll likely see a layer of brown matter where the soil meets the base of the grass blades. That’s thatch, and it’s totally normal. But if the thatch layer is more than an inch thick, it’s preventing much-needed water and nutrients from reaching the roots.
Also, lawns with a thick thatch layer might feel spongy underfoot or be difficult to penetrate with your finger as you try to reach the soil surface. It may not be an annual chore, but it’s still important to check your lawn each year for thatch. If you aren’t seeing the signs that your grass is in distress and there’s less than ½ inch of thatch, you can postpone pulling out the thatching rake.

Pro Tip
“Never use a power rake or a dethatcher on warm-season grasses like Saint Augustine or Bermuda. They’re just too harsh for these types [of grass].”
—Bryan Clayton, CEO of Tennessee-based lawn company GreenPal
When Should You Dethatch a Lawn?
Dethatch your lawn should be done when grass is primed for growth, which is typically in the spring, late summer, or early fall (depending on the grass variety and climate). Early spring and early fall are ideal times for cool-season grasses like Kentucky bluegrass and perennial ryegrass. Your cue to dethatch warm-season varieties like zoysia and Bermuda grass occurs in spring or early summer after they’ve completely “greened up.”
Dethatching is stressful, so doing it when your lawn is at its strongest during the year will aid its recovery. “Avoid dethatching when your lawn is stressed, during extreme heat, or when it’s actively growing seedlings. Disturbing it during these times can cause more harm than good,” Clayton advises.
If your lawn is dormant or stressed by drought, don’t dethatch. You can do irreparable damage.
Dethatching a lawn should be avoided in certain circumstances to prevent unnecessary stress on the grass.
- Dethatching is generally not recommended when the lawn is experiencing extreme heat or drought.
- Also avoid dethatching when the grass is overly wet or saturated, as this can further harm the grass roots.
Before You Begin
Before you can start dethatching your lawn, you will need to prep it by mowing the grass to 2 inches tall or shorter, pick up any sticks or stones or other debris, and check the moisture level of the soil. Very wet or dry soil isn’t conducive for dethatching. If the soil is damp, it’s ok to proceed with dethatching.
Tools & Materials
Bobvila.com may earn a commission from purchases made through these links.
How to Dethatch a Lawn
It’s not difficult to dethatch a lawn, but it can be a lot of work if your lawn is large, you have a deep layer of thatch, or if your grass is thick. Here’s the process to follow.
Step 1: Select the right dethatcher for your lawn.
Use the information about tools above to select the best dethatching tool. This decision depends on the size of the lawn and the thickness of the grass.
Step 2: Push the dethatcher across the lawn in parallel passes.
After you select the type of dethatcher that works best for you and your lawn, walk back and forth with the dethatcher in parallel passes like you would while mowing the lawn. Make sure the dethatcher reaches deep into the grass as you go.
Step 3: Clean up the loose thatch.

Dethatching leaves behind thatch that needs to be cleared. After you rake up the thatch, there are a few options for how to dispose of the yard debris:
- Bag it as yard waste for your next garbage pickup.
- Call your municipality to see if they have a composting program.
- Compost it for your garden. Avoid this option if your lawn is chemically treated or full of weeds at the time of dethatching.
Step 4: Aerate the soil.

Once you’ve cleared away the debris, you can aerate the soil directly after dethatching, if needed. Turf can be aerated every one to five years, depending on the lawn. Grass with heavy soil or lots of foot traffic will benefit from being aerated more frequently. Aeration is best done in spring, late summer, and even early fall. You want to aerate when the grass is primed for growth.
Use a hollow tine or core aerator to remove plugs from the ground. You want to remove cores as deeply as possible from soil that is moist but not wet, as dry soil prevents the tines from digging deeply.
Step 5: Fertilize the lawn.

After you’ve made a few passes of the lawn with the aerator, you can water and fertilize the lawn immediately.
Maintaining a Lawn After Dethatching
Unlike mowing the lawn, dethatching is not a frequent lawn chore. Instead, it’s something you might do every 2 to 3 years, depending on the type of grass and your growing conditions. Some fast-growing grasses like fescues and Kentucky bluegrass are more prone to thatch than other varieties, especially when grown in compacted or heavy clay soil.
After dethatching it’s important to care for your lawn with proper aerating, fertilizing, and watering. Plus, check the depth of the thatch layer at least once each year so that the layer doesn’t get so deep that dethatching becomes a heavy-duty chore.

Nobody makes lawn care easier.
Leave it to the pros at TruGreen. Sign up today to get 50% off your first service—and your weekends back.
GET A QUOTE
When to Hire a Pro
There are times when having a professional lawn dethatching service come to your home is the best option for you and the health of your grass. For big thatch-removal jobs, thick patches of thatch, or if you simply don’t have the time, a service company may be a great option.
Professional lawn dethatching services have seasoned experts to rake and remove thatch from a yard with precision. They already have all the tools they need, saving you from having to purchase new ones.
Experts also know which tools the grass can withstand, and which ones are too aggressive, leaving the lawn in a better state than a first-time DIYer, who may mistakenly remove healthy turf in addition to thatch. You can usually expect to pay between $100 (for a smaller lawn) to $600 (for a large lawn) for 1 to 2 hours of work.
The post Dethatching a Lawn 101: Why It’s Important, and How to Get the Job Done appeared first on Bob Vila.